お知らせ
A Complete Guide to Using the 'Event Posting Feature'
2022年04月04日
Table of Contents
1. Signing Up & Signing In to Domingo
1-1. [For New Users] Signing Up
1-2. [For Registered Users] Signing In
2. Entering Organizer/Operator Information and Applying for Registration
3. Managing Events
3-1. Creating a New Event Page
3-2. Editing an Event Page
3-3. Sharing an Event Page
3-4. Checking Event Page Access Statistics
3-5. Deleting an Event Page
4. Managing Organizers
4-1. Adding Members to an Organizer
4-2. Changing Member Permissions or Deleting Members
4-3. Changing Organizer Information
4-4. Deleting an Organizer
5. Managing Announcements
5-1. Registering/Updating an Announcement
5-2. Editing an Announcement
6. Managing Your Account
1. Signing Up & Signing In to Domingo
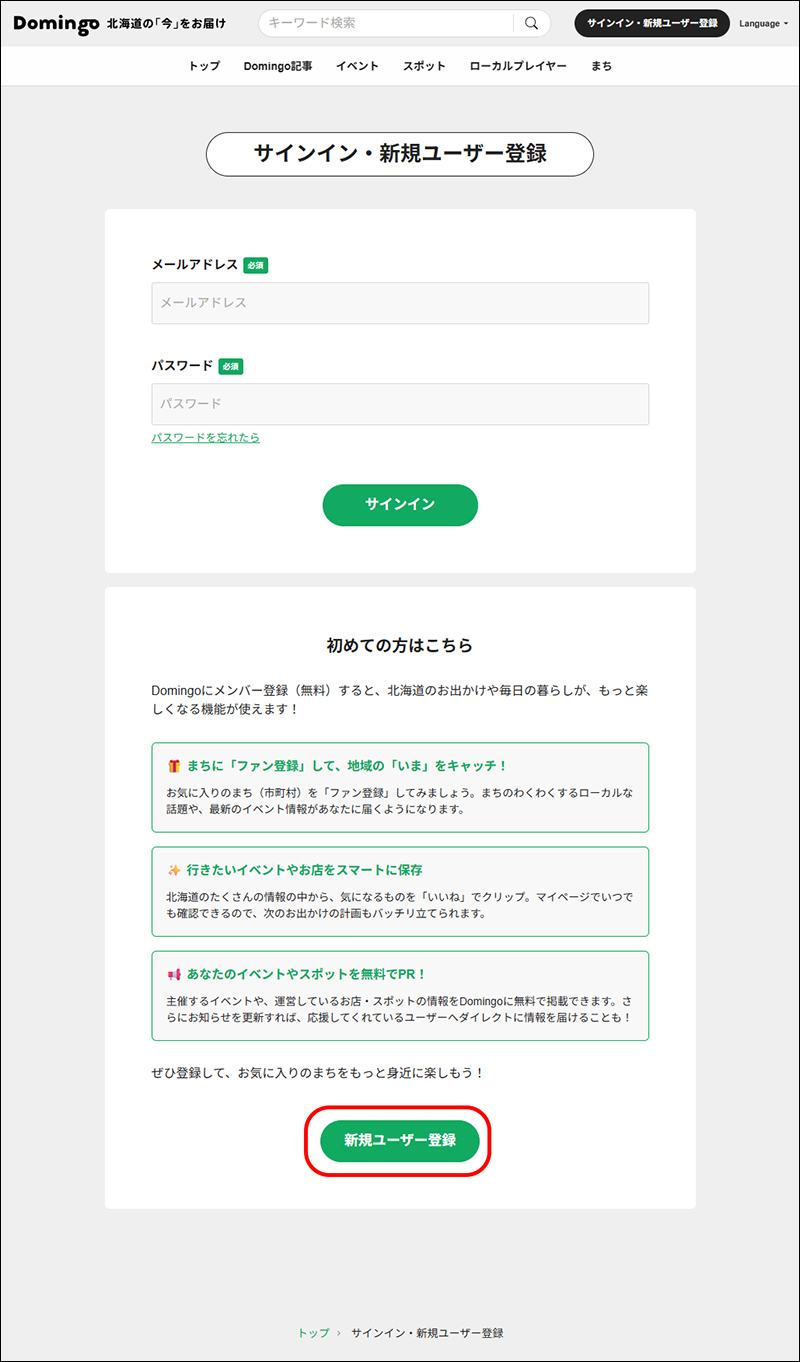
Click the "Sign In / Sign Up" button in the website header.

1-1. [For New Users] Signing Up
① Click the "Sign Up" button
After clicking the "Sign In / Sign Up" button, click the "Sign Up" button at the bottom of the screen.
② Register your email address and password
Set your email address and password, then click the "Register" button.

③ Confirm your registered email address
Once registration is complete, a confirmation email will be sent to the email address you provided. Access the URL in the email and enter your profile information to complete your user registration.
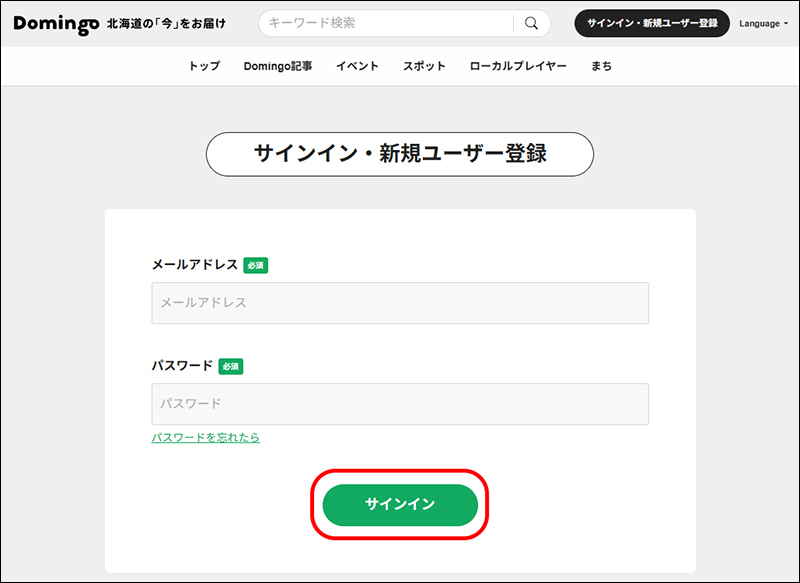
1-2. [For Registered Users] Signing In
On the screen after clicking "Sign In / Sign Up," enter your registered email address and password, then click the "Sign In" button.
*If you forgot your password
Click "Forgot your password?" below the password input field, enter your registered email address, and click the "Send" button.
A password reset email will be sent to your registered email address.
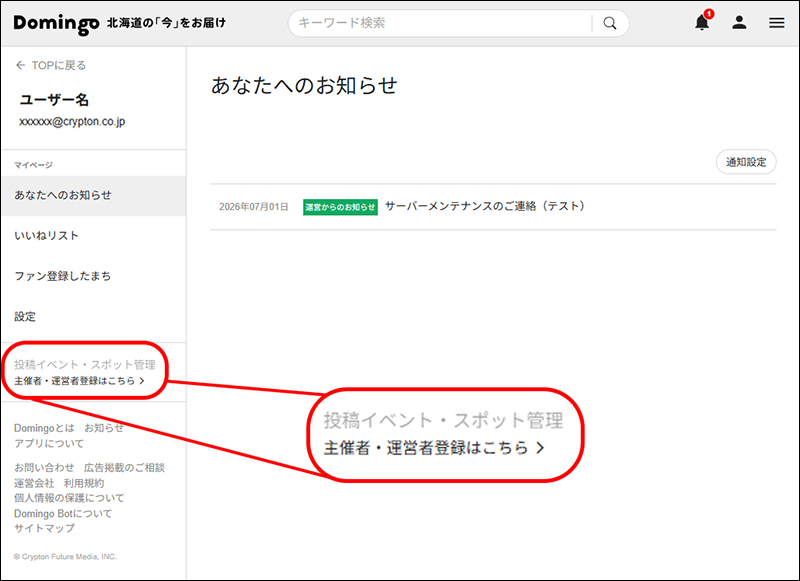
2. Entering Organizer/Operator Information and Applying for Registration
For your first post, you must apply for registration as an event organizer in advance. After signing in, go to your My Page, and under the "Manage Posted Events & Spots" section, click "Register as an Organizer/Operator >" to enter your registration details.
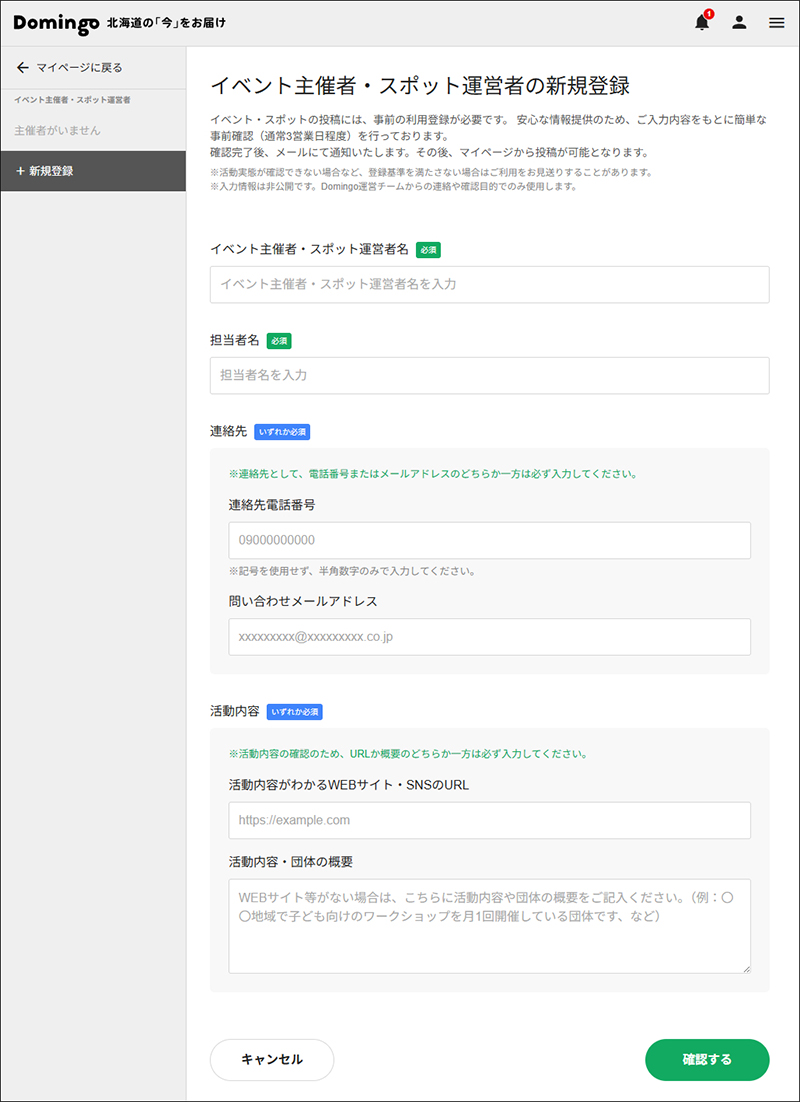
■ Event Organizer/Spot Operator Name (Required)
■ Contact Person's Name (Required)
■ Contact Information (one of the following is required)
- Contact Phone Number
- Contact Email Address
- URL of website or social media showing your activities
- Description of activities/organization
After entering the above information, click "Submit with this content" to complete your registration application.
After you submit your application, the Domingo team will review it and send a notification email to your registered email address within 3 business days.
*You will not be able to use the "Event Posting Feature" until the review is complete.
If you have already registered as an event organizer, you can create a new event by clicking "Manage Posted Events & Spots" on your My Page.
3. Managing Events
Once you receive the confirmation email from the Domingo team, you will be able to create new events and manage information from "Manage Posted Events & Spots" on your My Page.

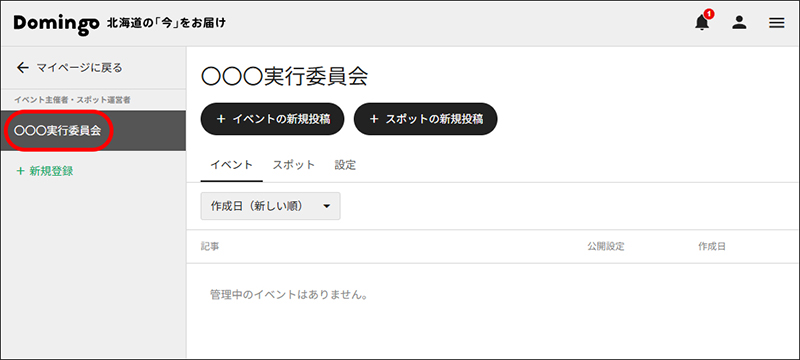
3-1. Creating a New Event Page
① Select the event organizer from the "Event Organizers/Spot Operators" list
Select the organizer for the event you want to create.
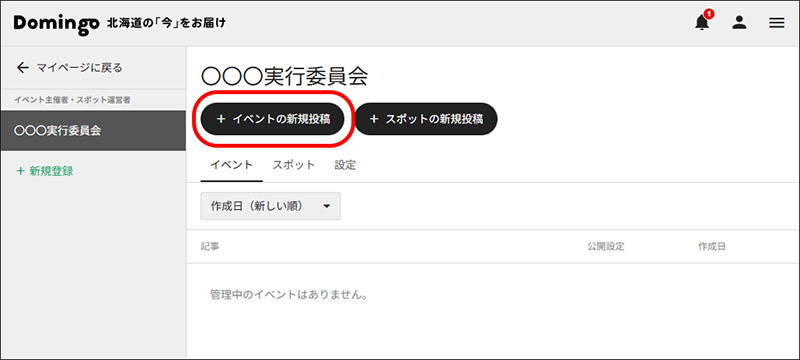
② Click the "Create New Event" button
Click the "Create New Event" button.
③ Enter event information
Enter the information for the event you are creating.
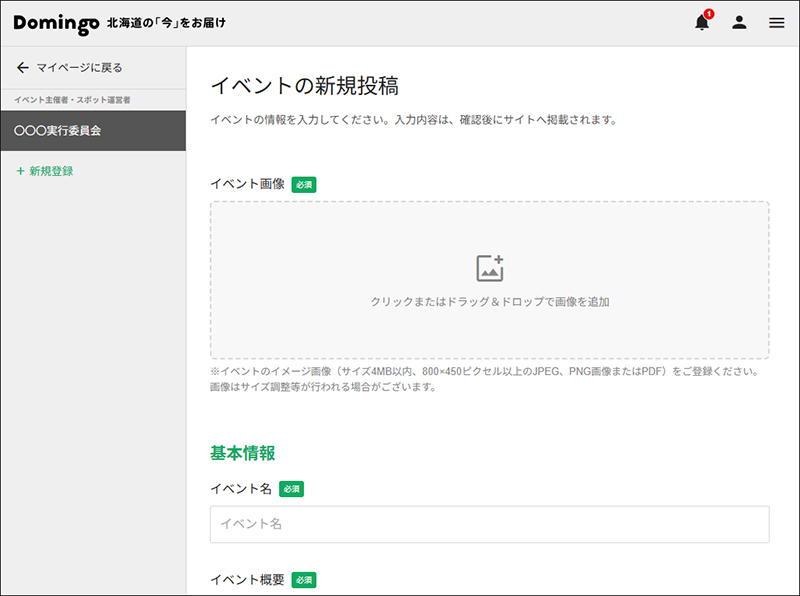
■ Event Image (Required)
Photo, flyer, or other image to be posted on the event page.
*Event image (JPEG, PNG, or PDF, under 4MB, 800x450 pixels or larger)
■ Basic Information
・Event Name (Required)
・Event Description (Required): Detailed text for the event page (event overview, application method, capacity, etc.)
・Event Category (Required): Select the closest category from the options (up to 3)
■ Date and Time
・Start Date (Required)
・End Date (Required)
*If the event end date is not fixed or is flexible, check the box to display it as "From [Date]" without showing an end date.
・Date/Time Details: Details such as event start and end times.
■ Location
・Municipality (Required)
*You can set multiple locations by clicking "Add Municipality."
・Venue Name (Required)
・Venue Address (Required)
・Google Maps Embed Code
・Multiple Venue Display
*Checking this will display the name as "[Venue Name] and others."
■ Fees
・Fee: Participation fee, admission fee, etc.
・Event Application URL
■ Contact Information
・Contact Name (Required): Name for event inquiries (the organizer's name is automatically filled in. Please correct it if the contact name is different).
・Contact Phone Number: Phone number for event inquiries.
・Contact Email Address: Email address for event inquiries.
■ Related URLs
・Official Website URL: Website of the event or organizer.
・Related Sites: URLs of other web pages or social media to be listed (up to 5).
■ Publishing Settings
・Publishing Setting (Required): Check "Publish" to make the event page public. Check "Save as Draft" to save it as a draft.
・Agreement to Terms of Use (Required): You must agree to the terms of use to create an event page.
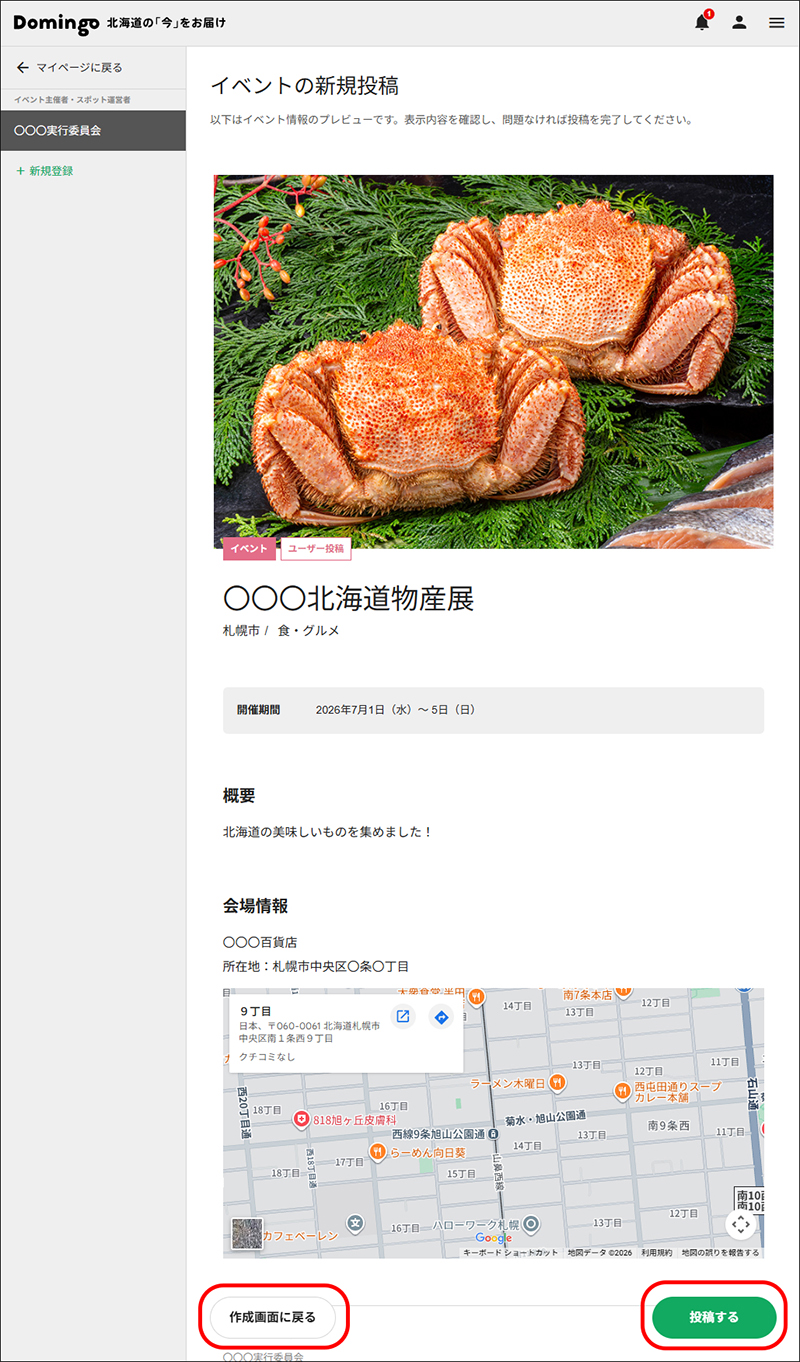
④ Check the preview and complete creation
After entering the required items, click the "Preview" button.
Check the preview for any errors. If there are corrections, click "Return to Edit Screen" to fix them. If everything is correct, click "Post" to complete the event creation.
3-2. Editing an Event Page
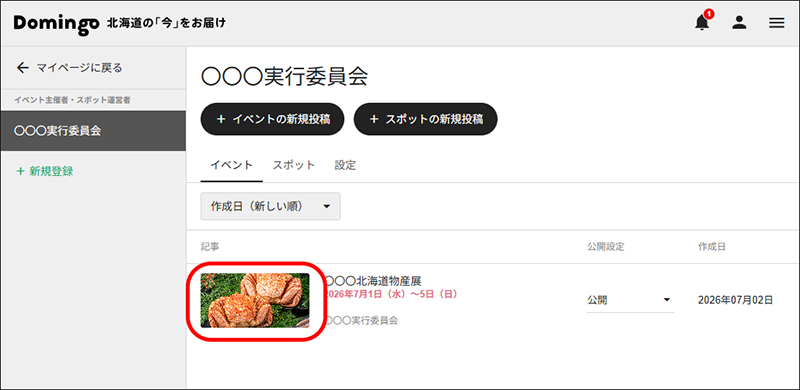
① Click the event you want to edit
From "Manage Posted Events & Spots," click the event you want to edit.
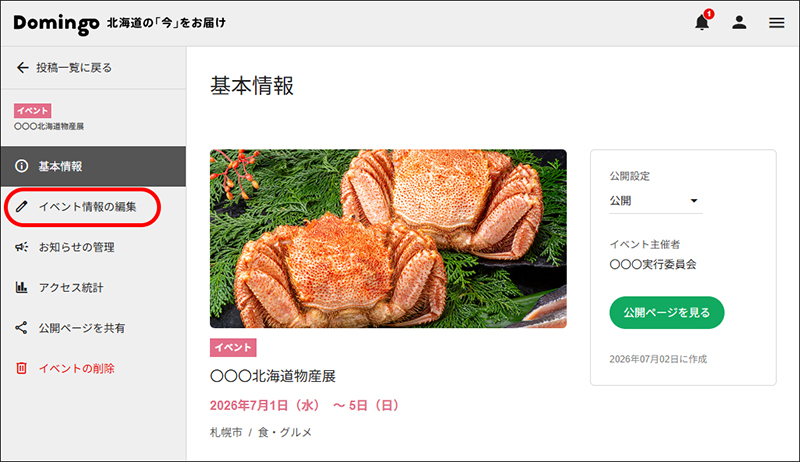
② Click the "Edit Event" button
From the menu on the left, click the "Edit Event Information" button.
③ Edit the event information
Edit the desired items in the existing event information.
④ Check the preview and complete editing
Once you've finished editing, click the "Preview" button, just as when creating a new event.
Check the preview for any errors. If there are corrections, click "Back" to fix them. If everything is correct, click "Complete Editing" to finish editing the event.
3-3. Sharing an Event Page
① Click the event you want to share
From "Manage Posted Events & Spots," click the name of the event you want to share.
*Same as 3-2.①
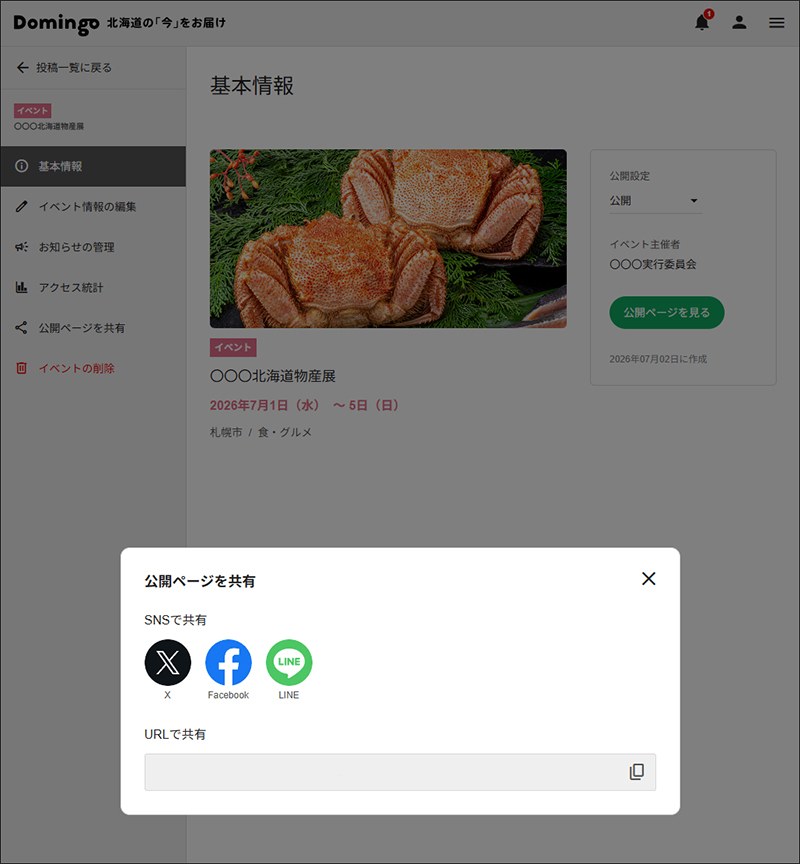
② Click the "Share Public Page" button
From the menu on the left, click the "Share Public Page" button, select the social media you want to share to, or copy the event page URL to use.

3-4. Checking Event Page Access Statistics
① Click the event for which you want to check access statistics
From "Manage Posted Events & Spots," click the name of the event for which you want to check access statistics.
*Same as 3-2.①
② Click the "Access Statistics" button
From the menu on the left, click the "Access Statistics" button.
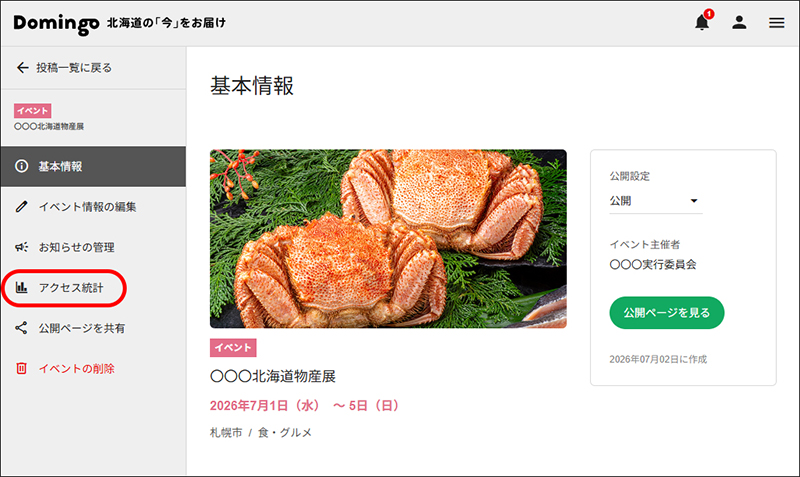
You can check the access statistics data for the event page within Domingo since its creation date.
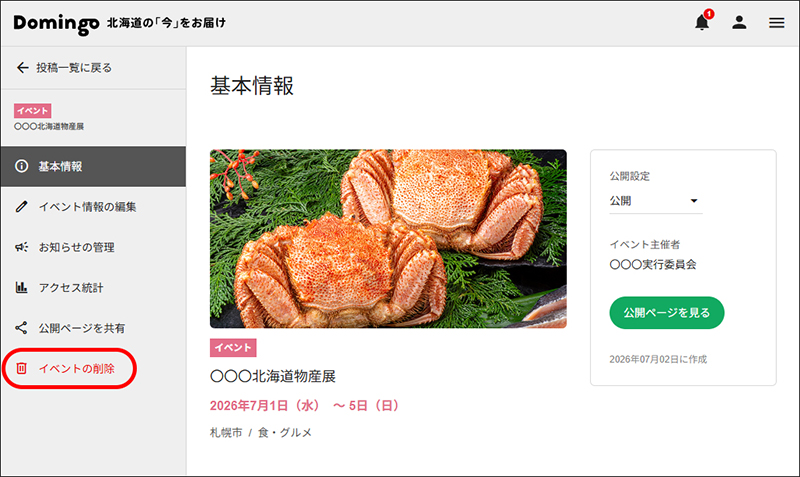
3-5. Deleting an Event Page
① Click the event you want to delete
From "Manage Posted Events & Spots," click the name of the event you want to delete.
*Same as 3-2.①
② Click the "Delete Event" button
From the menu on the left, click the "Delete Event" button.
4. Managing Organizers
Sign in to Domingo and go to "Settings" within "Manage Posted Events & Spots" on your My Page to manage events, members, and organizer information.
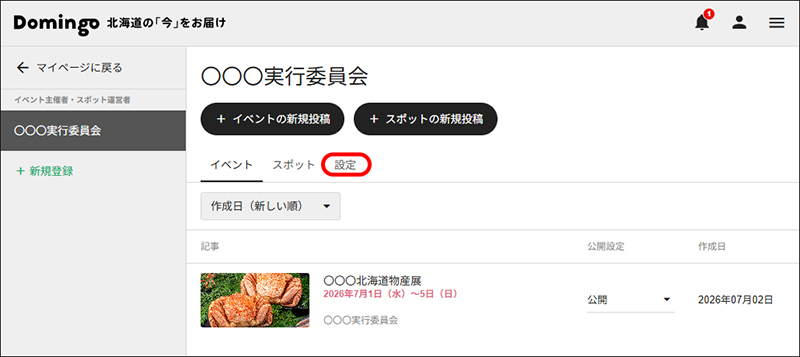
4-1. Adding Members to an Organizer
If you have administrator privileges for an organizer, you can add members.
① Select the organizer to which you want to add a member
From the list of registered organizers in "Manage Posted Events & Spots," select the organizer to which you want to add a member.
② From "Settings," click the "Add Member" button
Click "Add Member," enter the email address of the member you want to add, and click the "Invite" button.
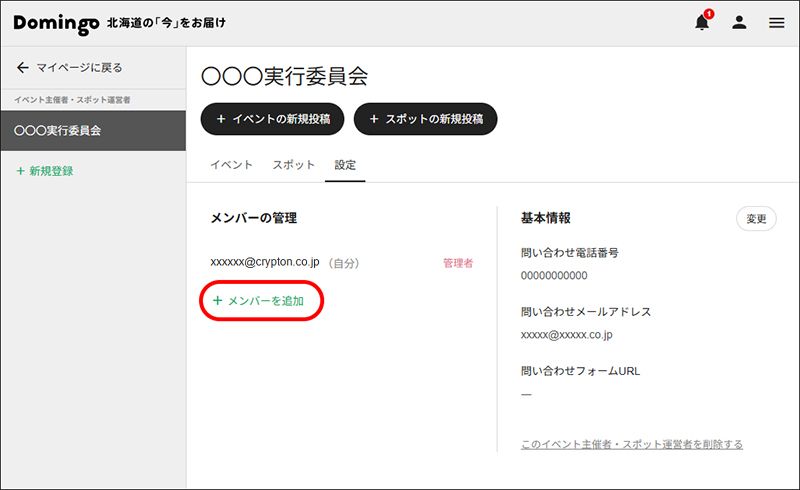

An invitation email from Domingo will be sent to the entered email address. Once the invited member completes registration from the email, they will be displayed as a member of the organizer.
*If you are invited as an organizer member
If you are invited as an organizer member, you will receive an invitation email from Domingo. Access the URL in the email and either sign up for a new Domingo account or sign in.
4-2. Changing Member Permissions or Deleting Members
If you have administrator privileges for an organizer, you can change member permissions and delete members.
① Select the organizer with the member whose permissions you want to change or delete
From the list of registered organizers in "Manage Posted Events & Spots," select the organizer with the member whose permissions you want to change or delete.
② In the member management section under "Settings," click the three-dot button next to the member's name
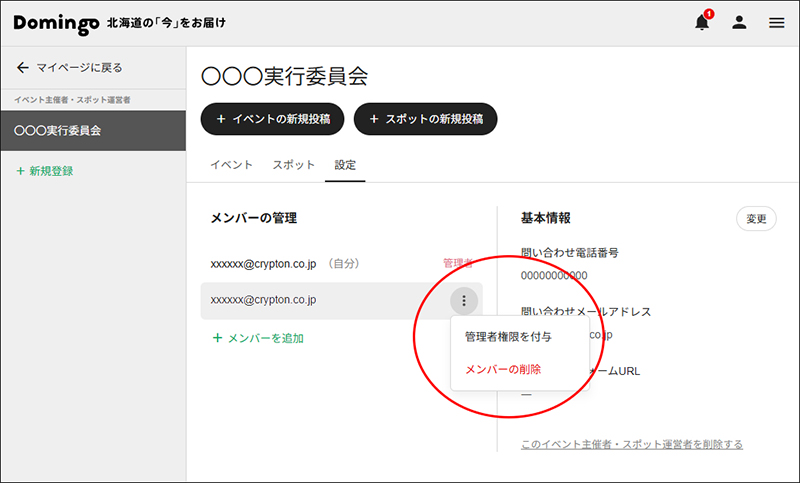
■ To grant administrator privileges to a member without them: Click "Make Administrator"
■ To revoke administrator privileges from a member (including yourself): Click "Revoke Administrator Privileges"
■ To delete a member: Click "Delete Member"
4-3. Changing Organizer Information
① Select the organizer whose information you want to change
From the list of registered organizers in "Manage Posted Events & Spots," select the organizer whose information you want to change.
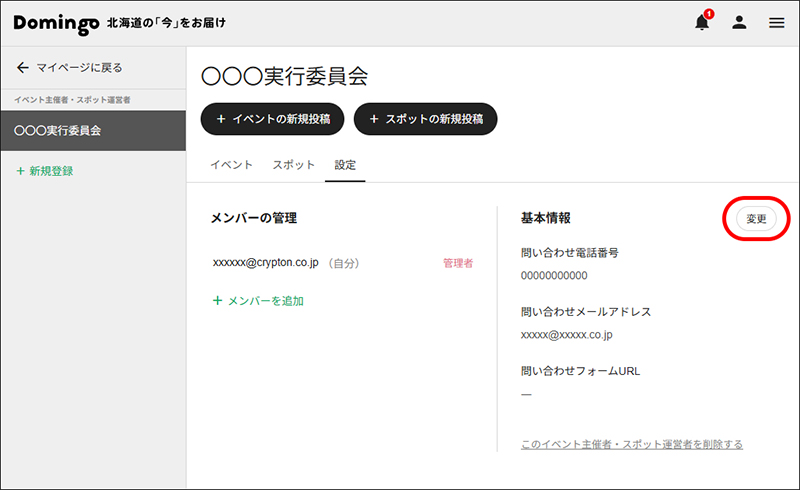
② From "Basic Information" under "Settings," click the "Change" button
On the "Change Event Organizer/Spot Operator Information" screen, modify the information you want to change and click the "Change" button to complete.
4-4. Deleting an Organizer
① Select the organizer you want to delete
From the list of registered organizers in "Manage Posted Events & Spots," select the organizer you want to delete.
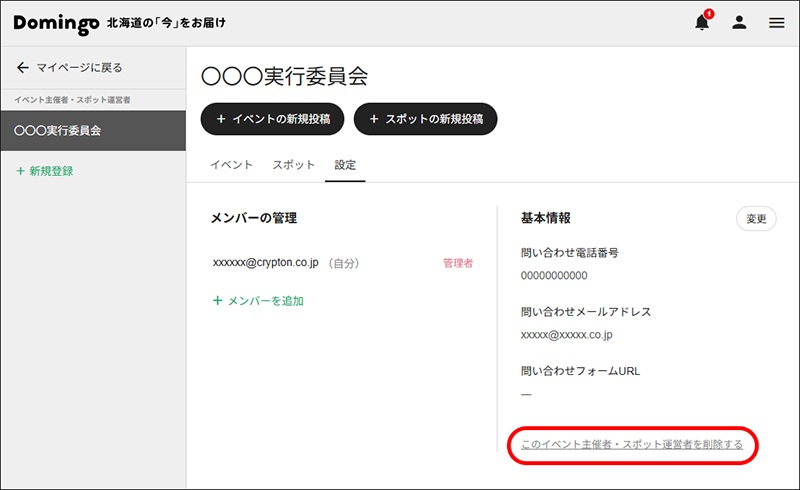
② From "Basic Information," click "Delete this Event Organizer/Spot Operator"
When you click "Delete this Event Organizer/Spot Operator," a confirmation message will appear. Click the "Delete" button to proceed.
5. Managing Announcements
In the announcements section, you can post updates for each event. You can announce additional event information like "XXXX has been added!" or notify of changes such as "Due to circumstances, the event has been postponed to XX."
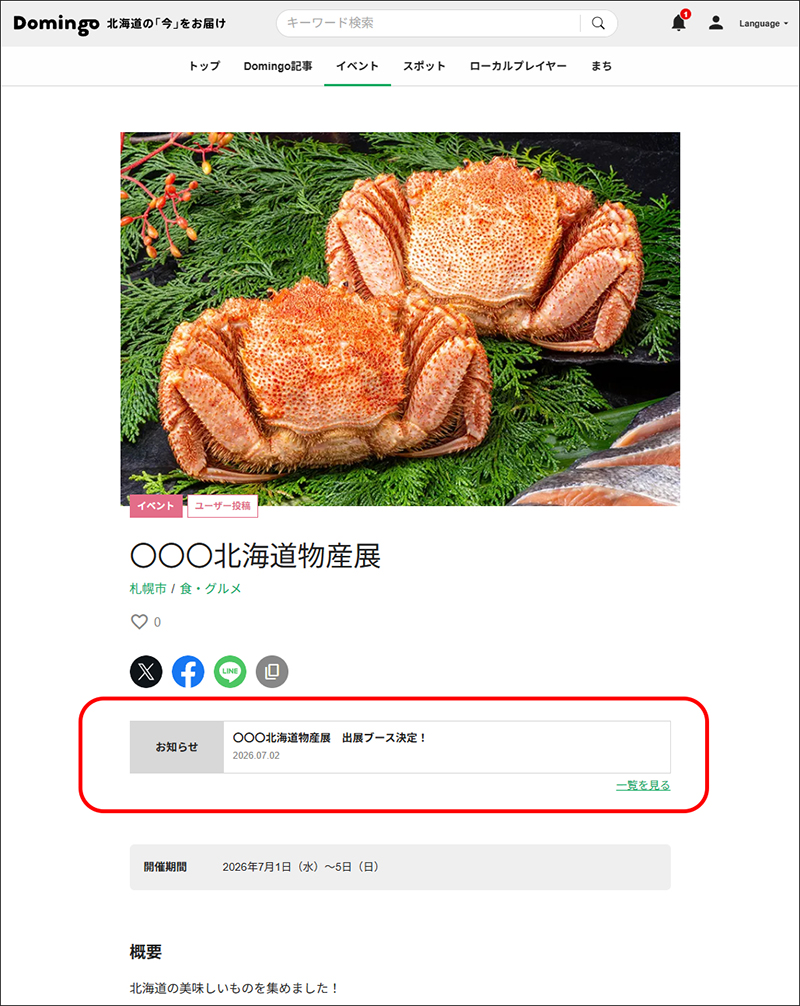
Furthermore, when an announcement is updated, a push notification will be sent to users who have "Liked!" the corresponding event in the Domingo app.
5-1. Registering/Updating an Announcement
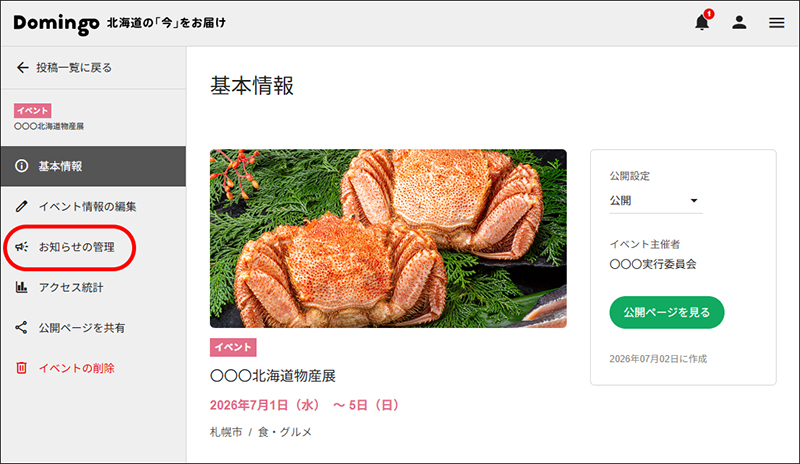
① Select the event for which you want to register an announcement
From the list of registered organizers in "Manage Posted Events & Spots," select the organizer and click the event you want to edit.
② Click the "Manage Announcements" menu
From the menu on the left, click "Manage Announcements."
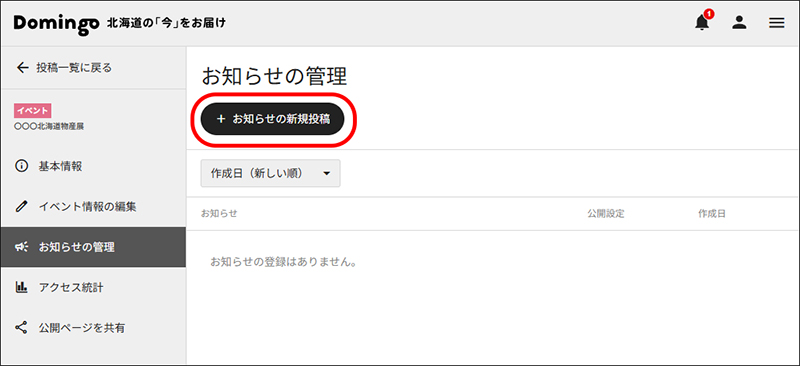
③ Click the "New Announcement" button
④ Enter the announcement content
Enter the information for the announcement you are creating.
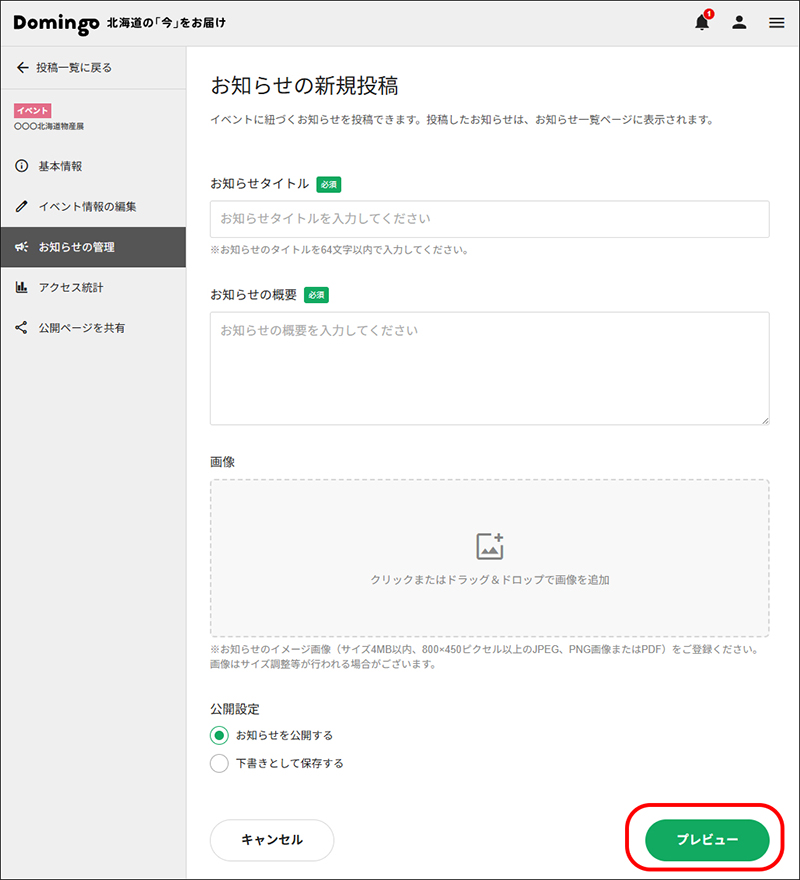
■ Announcement Title (Required): The title of the announcement.
■ Announcement Description (Required): The details of the announcement.
■ Image
*JPEG, PNG, or PDF, under 4MB, 800x450 pixels or larger.
■ Publishing Setting (Required): Check "Publish Announcement" to make it public. Check "Save as Draft" to save it as a draft.
⑤ Check the preview and finish creating
After entering the required items, click the "Preview" button to see a preview.
If the content is correct, click the "Post" button to update.
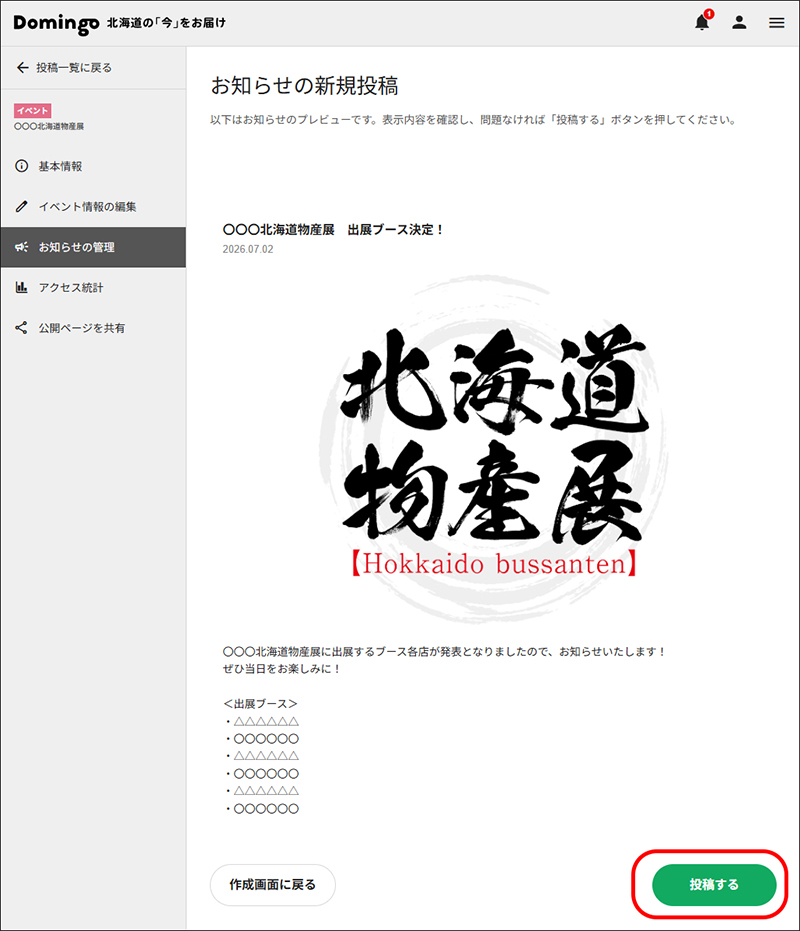
To save as a draft without publishing, check "Save as Draft" in the publishing settings and click the "Save Draft" button. It will be saved as a draft (drafts are not public).

5-2. Editing an Announcement
① Select the announcement you want to edit
From the list of registered organizers in "Manage Posted Events & Spots," select the organizer and click the event you want to edit.
② Click the "Manage Announcements" menu
From the menu on the left, click "Manage Announcements."
③ Click the announcement you want to edit
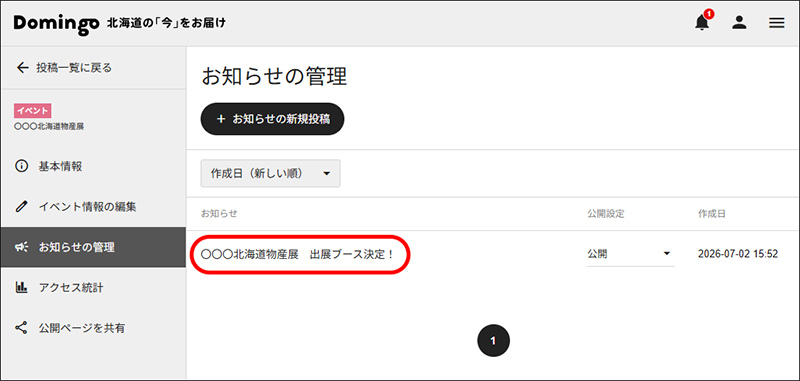
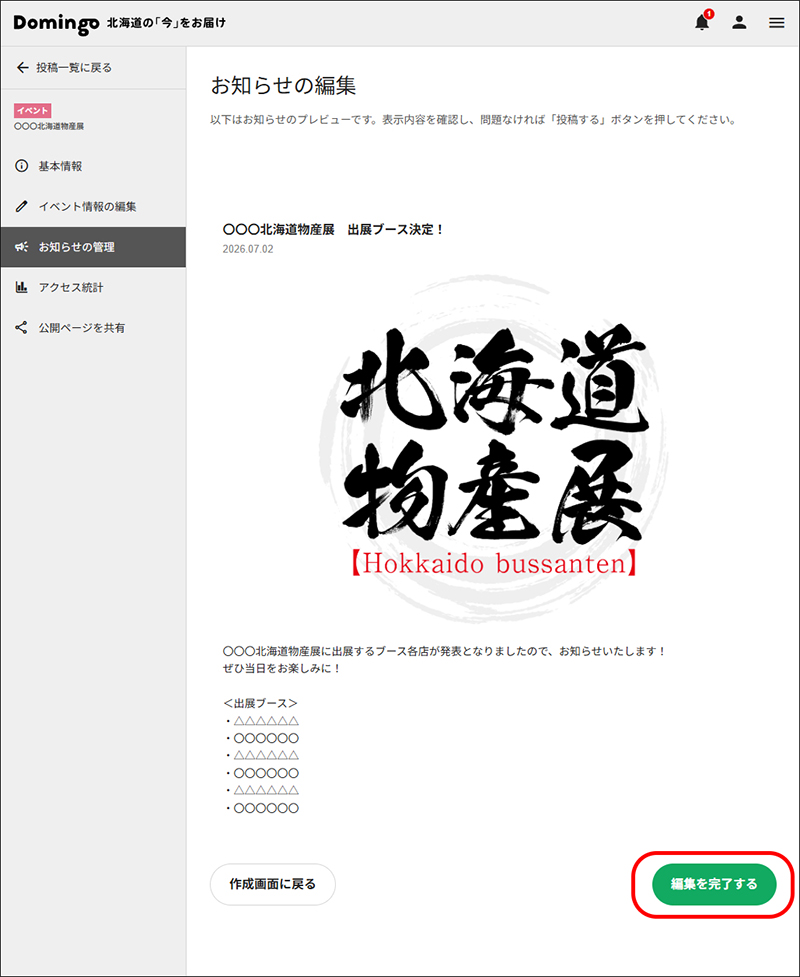
④ Check the preview and complete editing
If the preview content is correct, click the "Complete Editing" button to update with the edited content.
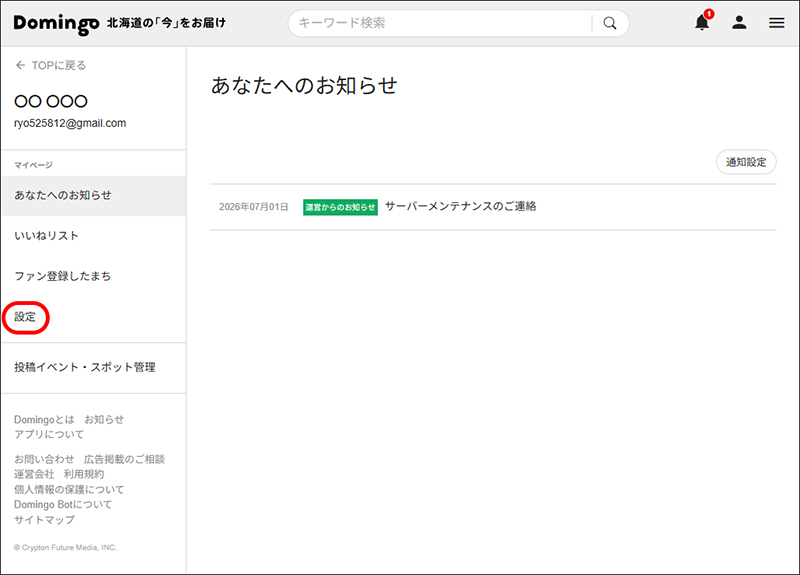
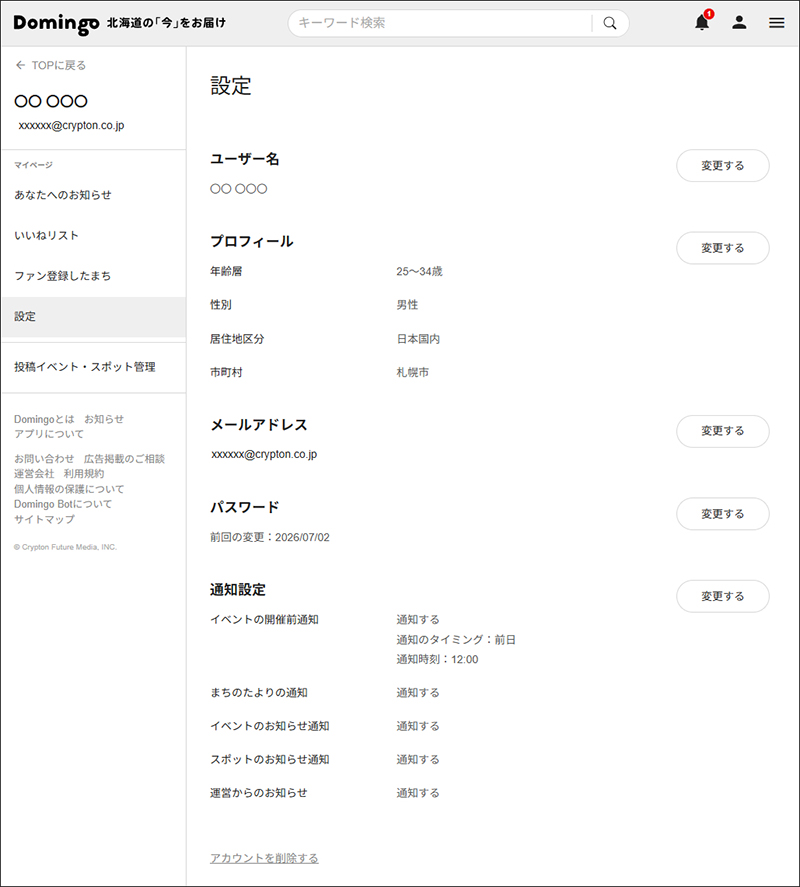
6. Managing Your Account
Sign in to Domingo and manage your account from your My Page. After signing in, click "Settings" from the menu on the left side of your My Page.
You can change your username, profile, email address, password, and notification settings.